
The RP2040’s novel Programmable Input/Output (PIO) subsystem allows the execution of tiny ‘PIO-assembly’ programs parallel to the CPU. It has direct access to the chips DMA-controller and GPIO-pins and is thus a very powerful augmentation to the RP2040’s classic peripherals.
In a previous article at Heise, we have developed a very simple PWM-signal generator using this PIO subsystem. In this article we will try out and test that implementation. You will learn how easy that process gets with our ExecutionPlatform.
Outline
Our ultimate goal is to create a Robot Framework test suite that
- starts the PWM generator on the microcontroller,
- evaluates the generators functionality against some requirements
- and allows for the generators output to be visualized using a logic analyzer or oscilloscope.
To invoke the functions necessary to configure and start the signal generation from our test suite, we will use the Code Interface. For the evaluation of the generated signal we will use the PWM Endpoint. And to make the generators output observable by an external device, we will use the Analyzer Endpoint.
Preparing the Test
The Configuration
Within the ExecutionPlatform sits a small circuit board containing the RP2040 chip and the minimal hardware required to make it functional (voltage supply, oscillator, etc.). We now have to tell the ExecutionPlatform what pins of that microcontroller it should connect to the ExecutionPlatform’s PWM Endpoint and what pins it should connect to the external logic analyzer. To do that, we add following lines to the configuration. We will later use this configuration to execute our tests.
PWM:
  PWM0:
    OUT: 9

Analyzer:
  Digital:
    0: SYSTEM.TEST_RUNNING
    7: PWM0.OUT
You can see that we connect pin 9 (corresponding to GPIO7 used for PWM generation) to the PWM Endpoint PWM0 and that we also relay that same pin to the digital analyzer connection 7. The pin SYSTEM.TEST_RUNNING has the simple purpose of showing whether a test on the controller is running (HIGH) or not (LOW). For more detailed information on how to create configurations refer to our documentation.
Writing the Firmware
Now there is only one thing keeping us from writing our test suite. We have to modify the firmware running on the microcontroller so that it can work with the ExecutionPlatform. Lets look at what the PWM generator requires to function:
- These two lines should run at startup to initialize the PIO program:
uint initial_pc = pio_add_program(pio, &pwm_program); pwm_program_init(pio, sm, initial_pc, 7); - The functions
void set_frequency(int32_t freq)andvoid set_duty(float duty)used to control the PWM generator should be callable from within our test suite.
Let’s focus on the second requirement first, the two controlling functions. To register them, they need to have following signature: int32_t func(uint8_t const* data, int len). This signature is necessary, since the test suite hands over the function arguments as strings. So let’s wrap both functions:
int32_t ep_set_frequency(uint8_t const* data, int len) {
    int32_t freq = stoi(std::string((char*)data, len));
    set_frequency(freq);
    return 0;
}

int32_t ep_set_duty(uint8_t const* data, int len) {
    float duty = stoi(std::string((char*)data, len)) / 100.0;
    set_duty(duty);
    return 0;
}
Now that all the functions have the correct signature, we can look at the main function of our firmware:
int ep_app_main() {
    initial_pc = pio_add_program(pio, &pwm_program);
    pwm_program_init(pio, sm, initial_pc, 7);

    // register functions so they can be called with DUT Invoke from robot test
    ep_register("set_frequency", &ep_set_frequency);
    ep_register("set_duty", &ep_set_duty);
    return ep_process_loop(); // wait for function calls from robot test
}
We simply initialize the PIO program using the two lines shown earlier and register the two controlling wrapper functions. This makes them callable from robot tests.
Note that when writing code to be executed on the Execution Platform, the entry point for user code is not the famous int main(), but int ep_app_main(). The ‘actual’ main() function is instead located somewhere in the Board Support Package (BSP). The function ep_app_main() is called automatically by the BSP. The last command of ep_app_main() should always be return ep_process_loop();. This starts the loop used to process invocations sent from the test suite.
Writing the Test
Everything is set up, so we can finally start writing the test! We’ll split up our Robot Framework test suite into three parts:
Settings– to set up the suiteKeywords– to simplify and increase the readability of the test casesTest Cases– the actual tests
We will take a look at them one by one:
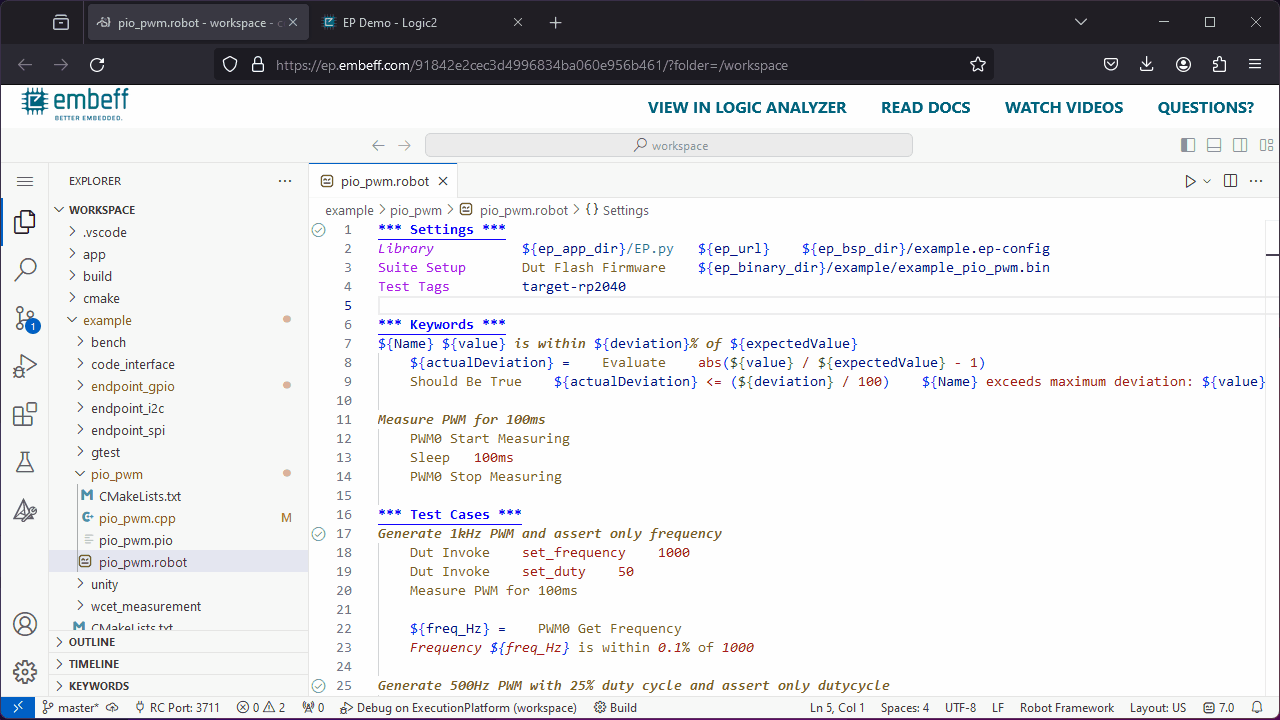
Settings
*** Settings ***
Library           ${ep_app_dir}/EP.py   ${ep_url}    ${ep_bsp_dir}/example.ep-config
Suite Setup       Dut Flash Firmware    ${ep_binary_dir}/example/example_pio_pwm.bin
First, we include the EP.py library for the ExecutionPlatform provided by embeff. It acts as the connection between Robot Framework and the ExecutionPlatform and is responsible for the execution of every ExecutionPlatform related keyword. It is also in charge of configuring the ExecutionPlatform with the config file mentioned earlier. For more information on this library refer to our documentation.
Additionally, we set the keyword Dut Flash Firmware to be executed every time the Robot test suite is setup/started. This flashes the RP2040 with the firmware at the specified path. This keyword is part of the ExecutionPlatform’s Code Interface and you can find more information about it here.
Keywords
*** Keywords ***
${Name} ${value} is within ${deviation}% of ${expectedValue}
    ${actualDeviation} =    Evaluate    abs(${value} / ${expectedValue} - 1)
    Should Be True    ${actualDeviation} <= (${deviation} / 100)    ${Name} exceeds maximum deviation: ${value}

Measure PWM for 100ms
    PWM0 Start Measuring
    Sleep   100ms
    PWM0 Stop Measuring
The intention of these two keywords is to increase the suite’s simplicity and readability.
The first keyword checks if a variable is within a certain deviation of it’s desired value. If not, the test case fails with a short error message.
The second keyword does exactly what it’s name says: It starts a measurement on the PWM Endpoint, waits 100ms and stops the measurement.
Test Cases
To evaluate the PWM generator we use two separate test cases: One to check if the frequency is within 0.1% of a desired value and one to check if the duty cycle is within 0.1% of a desired value. In a real world example you would naturally check for many different values and edge cases, but for brevity we will only check these two.
Both test cases work in a similar way: Firstly, they set the desired frequency and duty cycle by invoking the corresponding functions using the Code Interface. Secondly, they measure the generated PWM signal for 100ms by calling the earlier discussed keyword. Lastly, they check the measured values deviation from the desired value using the other previously discussed keyword.
During the whole test execution, the specified GPIO pin is exposed to the logic analyzer.
*** Test Cases ***
Generate 1kHz PWM and assert only frequency
    Dut Invoke    set_frequency    1000
    Dut Invoke    set_duty    50

    Measure PWM for 100ms
    ${freq_Hz} =    PWM0 Get Frequency

    Frequency ${freq_Hz} is within 0.1% of 1000

Generate 500Hz PWM with 25% duty cycle and assert only dutycycle
    Dut Invoke    set_frequency    500
    Dut Invoke    set_duty    25

    Measure PWM for 100ms
    ${duty_%} =    PWM0 Get Duty Cycle

    Dutycycle ${duty_%} is within 0.1% of 0.25
Trying it out
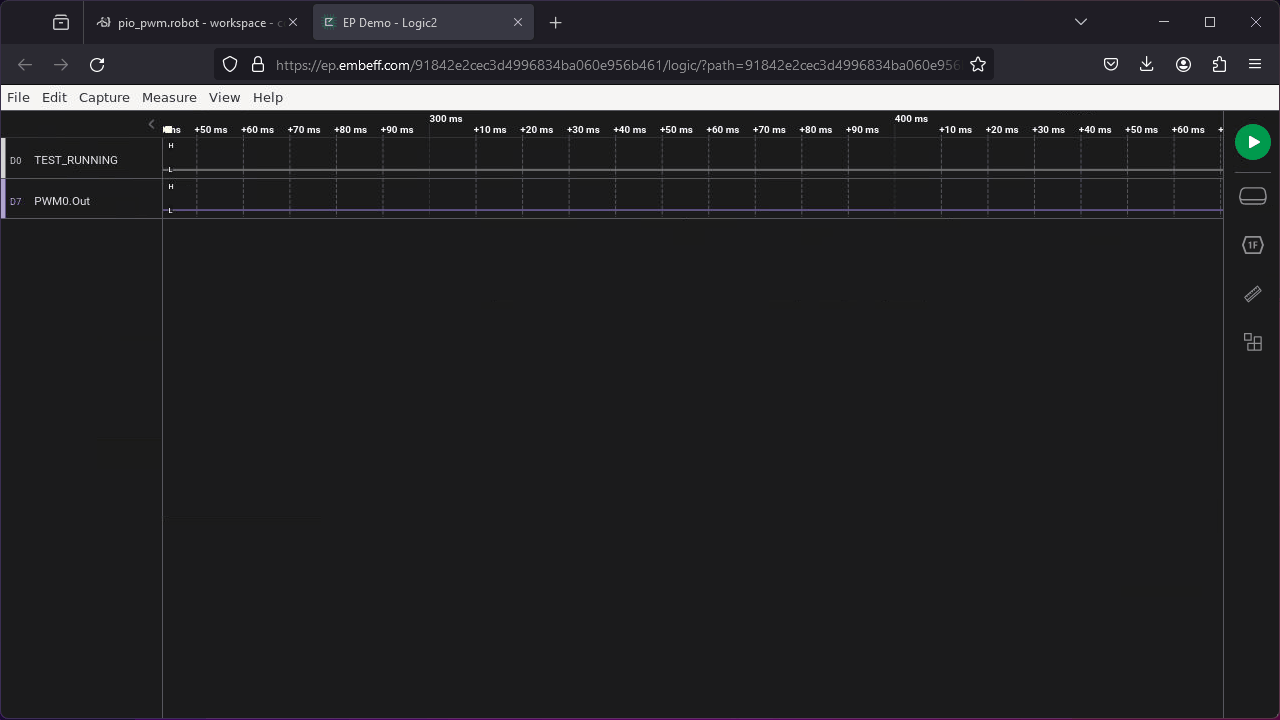
Now, we have only one thing left to do: Let’s harvest the fruit of our work! It’s as simple as starting a single test or the whole test suite from VS-Code by pressing the play button next to one of the test cases. The test results (PASS or FAIL) will be visible in the built-in terminal. In case we want to inspect the generated signal on the logic analyzer, we naturally have to start the analyzer’s recording/capture before starting the test:
Complete success! Both test cases are green, so it seems like our PWM generator can meet the >0.1% deviation requirement for both frequency and duty cycle.
But – as already discussed in the previous Heise article – the PWM generator also has its limitations: Due to timing issues in the PIO program, our generator cannot generate all frequencies and duty cycles with equal accuracy. It even fails at generating some specific signals. For example, the generator is not capable of generating signals with 100% duty cycle, since it always needs a few clock cycles to set the output pin after the start of a period.
So let’s try exactly that! We will change the second test case to generate and assert a signal with a 100% duty cycle and restart it’s execution:
As expected, the second test case now fails with an error message telling us, that the maximum deviation for the duty cycle was exceeded. Looking at the PWM generator’s output on the logic analyzer, we can visually verify the test results. It is obvious, that the signal does not have a duty cycle of 100%, but shows a short amount of time each period, where the output pin is low. This is exactly the amount of time the PIO program needs to set the output pin.
Try it for yourself
You can try out all of this and more for yourself on real hardware by accessing our online Demo. We’ll provide you with your personal instance of an online version of VS-Code connected to one of our Demo ExecutionPlatforms. After accessing the demo, you can navigate to the example discussed in this article, /example/pio_pwm/pio_pwm.pio. To see the logic analyzer, you can simply press VIEW IN LOGIC ANALYZER in the top right of your screen. You can even try to fix or minimize the limitations and faults of our simple PWM generator. To build your changes just hit the build button at the bottom of the screen.